
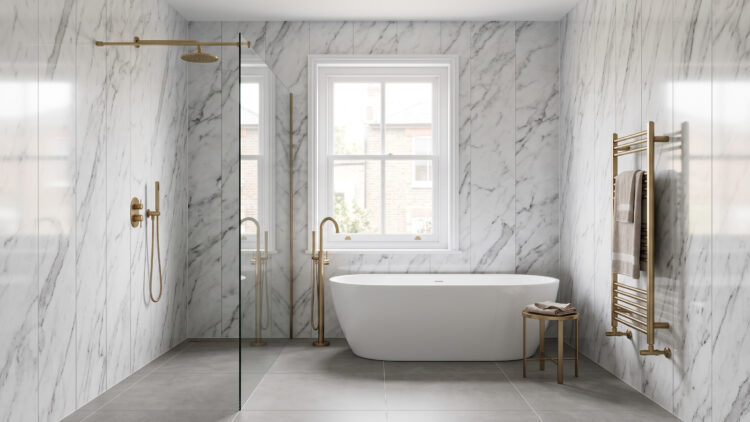
How to Fit Bathroom Cladding Panels in 6 Easy Steps
Tired of scrubbing grout and fighting mould around old tiles? Learning how to fit bathroom cladding panels is one of the quickest ways to refresh a bathroom without the mess, the cost or the long wait that comes with tiling. Most confident DIYers can finish a shower wall in a weekend, and tradespeople can clad a whole room in a day. In this guide, we explain how to fit bathroom cladding panels from start to finish, including choosing the boards, measuring, trims and sealing. Whether you are a homeowner planning a makeover or a builder fitting a bathroom for a client, you will find practical advice you can use straight away.
Why Learn How to Fit Bathroom Cladding Panels Instead of Tiling
Tiles look smart, but they take time. Every tile has to be spaced, fixed and grouted, and those grout lines collect soap scum and mould. PVC panels cover a much larger area in one piece, so there are far fewer joints to clean. That is why so many people now ask how to fit bathroom cladding panels instead of booking a tiler.
PVC is waterproof and lightweight. The boards are easy to carry upstairs, simple to cut and quick to fit without specialist tools. A wipe with a damp cloth is usually enough to keep them looking fresh, which is why they are popular in family bathrooms, en-suites and rental properties.
Here are the main benefits at a glance:
- A grout-free surface that is easy to wipe clean
- Fast installation, often in a single day
- Lightweight boards that are easy to handle and cut
- A wide choice of colours and finishes
- Suitable for walls, shower areas and ceilings
Cost is another factor. Tiling usually means buying adhesive, grout and spacers, and paying for a tiler’s time. Panels mostly need the boards, trims and sealant, so the overall bill is often lower, particularly for a full shower enclosure. The skills involved in how to fit bathroom cladding panels are simple: measure, cut, fix and seal.
For an independent view, read Homebuilding’s comparison of shower panels and tiles. It covers cost, fitting time and upkeep, and points out that panels have no grout lines to keep clean.
What You Need Before You Start
Before you learn how to fit bathroom cladding panels, it pays to choose the right product. A little planning at the buying stage saves a lot of cutting and head scratching later.
Finish and colour
Popular finishes include gloss white, marble effect and wood grain. Light colours make a small bathroom feel bigger, while darker stone effects add a feature wall. Think about your fittings, flooring and lighting before you decide, and order a sample if you are unsure how a colour will look in your own room.
Thickness and edge style
Tongue and groove boards slot together neatly to form a continuous surface. Thicker panels feel sturdier under the hand, so many people choose them for shower areas. Always check the thickness listed on the product page and make sure it matches the trims you plan to use.
Walls or ceilings
Ceiling cladding is lighter and designed for overhead fitting, so order the right product rather than using wall panels above your head. The method for how to fit bathroom cladding panels is similar overhead. If you are cladding both, fit the ceiling first. The wall panels can then finish neatly underneath the edge trim.
Tools and materials
- Tape measure, pencil and spirit level
- Fine-toothed saw for clean cuts
- Adhesive or fixings recommended for your product
- Silicone sealant and a sealant gun
- Corner trims, end caps and H trims
If you want more renovation ideas, browse the Celplas blog for guides on PVC building products.
How to Fit Bathroom Cladding Panels: Measuring and Planning
Good measuring is the secret to a tidy finish. Before you order, work through this short checklist:
- Measure the height and width of every wall you plan to clad
- Divide each wall width by the panel width to see how many boards you need
- Allow extra for cuts, awkward corners and mistakes
- Count the corners, edges and joins to work out your trims
- Check that the wall is dry, flat and free from damp
Trims matter as much as the boards themselves. Corner trims, end caps and H trims join panels and hide cut edges, and they help keep water out of the joints. Our finishing trims are designed to sit neatly alongside the panels, so pick them at the same time as your order.
If the wall is uneven, fit timber battens first. They give the boards a flat surface to sit on and make fixing much easier. This one step makes a big difference to how to fit bathroom cladding panels neatly on older walls.
How to Fit Bathroom Cladding Panels in 6 Steps
Here is how to fit bathroom cladding panels in six steps. Always follow the manufacturer’s instructions for your chosen product, and use this guide as a general overview.
- Prepare the wall. Remove loose paint, old wallpaper and any fittings in the way. The surface should be clean, dry and sound.
- Let the panels settle. Leave the boards in the room for a few hours before cutting, so they adjust to the temperature.
- Dry fit first. Lay the boards against the wall without fixing them, and check the cuts around windows, pipes and sockets.
- Start in the corner furthest from the door. Working towards the entrance keeps any awkward cut edges in the least visible place.
- Cut and fix. Use a fine-toothed saw for clean edges, then fix each board with the adhesive or fixings recommended for your product.
- Finish with trims and sealant. Fit corner and edge trims, then seal around shower trays, baths and basins with a quality silicone sealant.
A top tip when you practise how to fit bathroom cladding panels: measure twice, cut once and keep your offcuts. Small offcuts are handy for testing how a saw blade behaves before you cut a full board. Once you know how to fit bathroom cladding panels on one wall, the rest of the room goes much faster.
Common Mistakes When Learning How to Fit Bathroom Cladding Panels
Most problems when people learn how to fit bathroom cladding panels come down to preparation rather than the product itself. Avoid these slips:
- Fixing panels to a damp wall without finding and fixing the cause
- Skipping the dry fit, then finding a cut is too short
- Forgetting trims, which leaves raw edges and open joints
- Leaving gaps unsealed around the shower tray or bath
- Ordering too few boards and ending up with a mismatched batch
Order a little extra and keep it for repairs. Batches can vary slightly, so buying everything together helps the finish look consistent.
Keeping Your New Bathroom Walls Looking Fresh
Aftercare is simple. Wipe shower walls down after use, or squeegee them, to stop limescale and soap film building up. Clean them weekly with warm water and a mild bathroom cleaner, and avoid scouring pads, which can scratch the surface. Check the manufacturer’s guidance before using strong chemicals.
Start Your Project Today
Now you know how to fit bathroom cladding panels, you can plan your measurements, pick the right trims and take your time over the sealant. Celplas supplies panels and trims from Blackpool to customers across the UK, with free delivery over £100 and next-day delivery options.
Not sure which panel or system suits your needs, or how to fit bathroom cladding panels around awkward corners? Our team is happy to help, so contact us today.
How to Fit Bathroom Cladding Panels FAQs
Is it hard to learn how to fit bathroom cladding panels?
Not for most people. If you can measure accurately and make straight cuts, you can do it. Take your time over the preparation and the sealing, because those two stages decide how long the finish lasts.
Can I fit panels over tiles?
Often, yes. The tiles must be firmly fixed, clean and reasonably flat. If they are loose or uneven, battens or removal may be better. Check the guidance for your product first.
Are the panels waterproof?
PVC panels are waterproof, but water can still find its way through poorly sealed joints. Use the right trims and silicone sealant, especially in the shower.
Do I need a professional?
Many homeowners fit panels themselves. Call in a professional if the wall needs repair or the plumbing needs to move before cladding goes on.
How do I clean them?
Wipe with a damp cloth and a mild cleaner. Avoid abrasive pads, which can scratch the surface.